Even though my main love are captions, I don’t think that transcripts get the love, attention and respect it deserves. This is evident when most people just copy and paste a big chunk of text onto a document or web page and assume that “it will do”.
But you are missing out on so much more. And more importantly, so are you users.
If you are a content creator and use media such as videos and podcasts, having an accurate and well-designed can impact both your website/content and your audience experience.
So instead of dumping some text, consider following the step-by-step guide below on how to create, edit, structure and upload a transcript that your content and audience deserves.
You can watch the video below…:
…listen to the podcast…
…or read the transcript (wink, wink) instead.
Transcript
Don’t tell my wife, but my first true love is captions.
Sorry Claire!
But my other true love is transcript.
Sorry captions…..and Claire!
I don’t think transcripts get the attention and love it deserves, but they’re so, so important. And there are so many benefits that you can get out of it, not just from the people who needs it and access it, but even you as a podcast creator or a video creator, you can get so much out of transcript and you just gotta have it.
But the thing is, if you want to get the most out of transcript, there are certain things that you should follow. And I’m going to provide you with some awesome tips on how to create some awesome transcript.
And bear in mind that in here I’m going to be talking a general overview. If you want a more detailed step-by-step process on creating transcript, read on as this is a proper post in step-by-step, what you can do and you can also download a checklist below.
But before you even think about creating your transcript for your videos and your podcasts, there’s one thing that you ask is a very important question. And that is:
“Does my media need a transcript?”
Actually, what am I thinking? Scratch that. Don’t bother asking yourself that because I’ve got to answer for you. And the answer is yes, yes and yes some more.
You may not realise it, but transcript, just like captions, are a critical way for allowing users to access certain media. And if they want to access your media, then let’s give it to them.
You can do that with captions in the videos. But in (certain) situations, it might be better if you provide them with the transcript. But the thing is, it’s not just a copy and paste, and dump the transcript. There’s a style to it, there’s a love to it, you want to make an effort with it and I’m going to show you how you can do that
And as well as that, like I said, there are benefits to creating a transcript, just like captions. For example, you can improve SEO. You get better engagement. People will access your content, more traffic…All of these things.
So really, everyone can win with transcripts.
1. How to create a transcript?
1.1 Get yourself comfortable and set up
So let’s get into the first step on how to create a transcript, and even before you get into the actual creation process, let get’s comfortable.
Get a comfortable chair, see if you can get it ergonomic, get your equipment set up correctly, make sure that you have all this stuff lined up for you when you’re doing that, you have your water, your coffee, everything is set up.
Make sure you have your headphones, as good quality headphones will help you a lot to follow along. If you want to, you can use a sound equalisation tool to help you further. I like to use FXSound, they’re really cool.

And then also, if you’re going to be recording a transcript, then make sure you have a good quality audio.
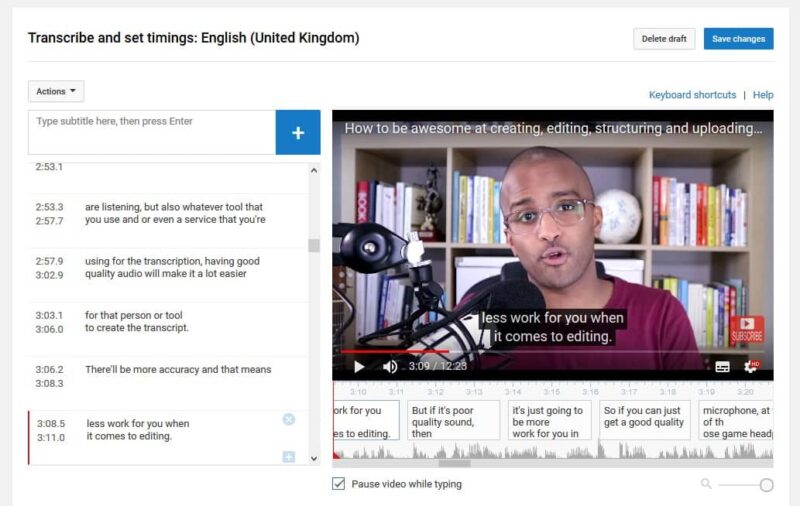
Not only the audio is good for those who are listening, but also whatever tool that you use and or even a service that you’re using for the transcription, having good quality audio will make it a lot easier for that person or tool to create the transcript. There will be more accuracy and that means less work for you when it comes to editing.
But if it’s poor quality sound, then it’s just going to be more work for you in the long run.
So if you can just get a good quality microphone, at the very least, one of those gamer headphones or even those hands-free kit, they can make a big difference as well.
1.2. Choose your transcription provider
And then there are the transcription provider that you can try to use to help you with that. And there are three things that you can do.
- you can create transcript yourself with a notepad or a document and you can start typing it out.
- you can use an automated tool using artificial intelligence to create a basic structure, the basic draft where you can then edit it afterward.
- get someone to do it for you, whether it’s a company that can do it for you or just an expert transcriptionist that can do it for you individually, whatever you can do.
You’ve got these three options. Personally, I would not recommend you to do it manually by yourself from scratch because it takes such a long time to do it.
Unless, of course, those videos or podcasts are really short, like maybe a few minutes long and you think you can manage by yourself, but otherwise I think you should use the other services to people like Rev, which has both automated or human-generated transcription service.
You can use Otter.ai, you can use people like HappyScribe and there are so many different options out there and you’ll be spoilt for choices.
You can even use YouTube to create auto-captions for free too after you upload a video file, download the file and find an online converter to convert it from e.g. an .srt file into a .txt file to get your transcript.

1.3 Always check your transcripts
But whatever you do when you create it, you have to make sure that you check it.
It doesn’t matter if you’re using your automated version or the human-generated version, you always have to check it. Just like when anyone create a blog post or an article, you check it, you edit it. Even more so when you have to use automated toos.
But like I said, whatever, you make sure you check it.
2. How to edit a transcript?
2.1. Choose true verbatim or clean verbatim

The next step as well is the process of actually editing it, and the first step then is to work out whether you want to use true verbatim or clean verbatim.
Long story short, what I mean by that is if you want to use true verbatim, you’re going to include everything in there, including the stuttering, the pause, the silence, the sound effect at times. And they will make it almost like-for-like to what you hear.
But then the clean verbatim, you’re not going to include the stuttering bit when someone just saying “umm…ahhh…what…ahh…hmm” You don’t have to worry about that.
So work out what you want to do. It really depends on what your style is, what you want to do with it and depending what are you transcribing, it will depend on that.
2.2. Consider using different transcription formatting
Then you have to think about the different transcription formatting that you should use.
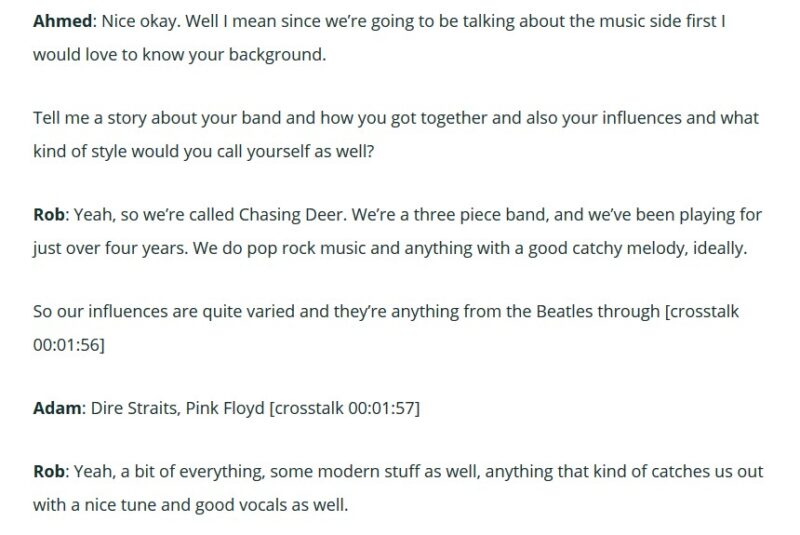
So for example, there are things like speakers labels. If you’re doing an interview then of course it’s going to be from one person to another. In this case, make sure you have the speakers’ name at the beginning of certain paragraph.

You don’t have to do it every single paragraphs, but if there is a big chunk of text, separated by paragraphs, and it’s spoken by one speaker, you can mention (or label) it once and then the change speaker label when it goes to the other person and so on and so on.

And then there are things like “timestamps”. Sometimes they’re useful, sometimes they’re not. Again, you can do in between the text or you can do it after each paragraph or maybe you want to do it after certain seconds. There are different ways of doing that as well.
And then they are certainly sound that is difficult to pick up.
So, for example, inaudible tags, you might want to put in [inaudible].
Or maybe there are crosstalk and that even more than one person or speaker on top of each other and you can’t make out what they’re saying. So you put in [crosstalk]. That’s another tag you can use.

3. How to structure and upload a transcript
Then the next step in the process of uploading and structuring your transcript. This is so, so important because the general thing that people do it just copy and paste and then that’s it; publish it.
But you are missing out on so much. And not only that, you are doing a disservice for people who want to access your content.
So here are the things that you should be thinking about when you are uploading your transcripts.
Generally, there are three different type of transcripts: 1) there is the basic one, 2) there is the descriptive one and 3) the interactive one.
The basic one is literally just a big text and you dump it, and that’s it.
Descriptive is when you provide different media, different experiences, you create the structure; so many things.
And the interactive one, you tend to see that in the tools. It literally follows the word-by-word. So if a person speaking, certain words are highlighted and then you follow along, and that’s not really a common thing you see on a website anyway.
What I prefer and recommend is the descriptive transcripts and this is what you should do.
3.1. Add different media to the page (like images and videos)

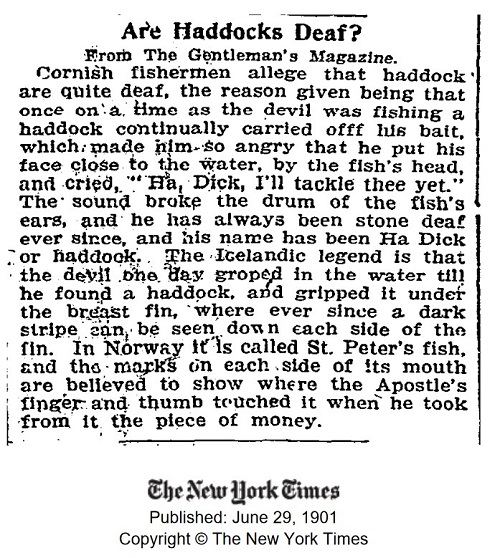
Consider adding different types of media for better engagement. So instead of just adding paragraphs and text, put in some images, put in some videos, separate it, make it more visually appealing and not just looking at text (like the image above).
And not just adding random videos and images make it useful. Maybe they can support your transcript, maybe it provides some extra to transcripts. Those visual guide would be very useful, so consider adding them as well (as you can see in ths post).
3.2. Always format your posts

Always use the option of formatting the text. The most important one, I would say is the headings and use subheadings.
You got the headline and then you just use the subheading and then you subheading even more if it’s relevant; use that.
And also consider using the bold and italic…
…and even the quotation tags…
…you can use that as well (where appropriate).
And even on top of that, use internal links to link to relevant sources, whether it’s on your website or link to another resource that’s going to be useful for your audience. They are also useful to make the transcript a lot more of a rich experience.
When you have those formats, you actually making it even more useful for you in terms of SEO, especially the headings and the internal links.
They are beneficial for SEO, they can get that traffic for you and it just makes it really, really good for Google to crawl your content and find what you’re looking for, understand what that page is about and just continue from there.
So it would benefit Google as well.
3.3. Always make it readily available
And I can’t emphasize enough on how important this next step, which is to always make it readily available.
What I mean by that do not force your users to submit an email address to download it. Do not make it difficult to find. Do not make it hidden, and you have to submit something for them to access it.
No, that’s just taking the piss.
If you are already providing your video/podcast available, you don’t have to download anything or pay for something or submit email address, if they are there available for your users, then it’s only fair and it’s only right to give that equal opportunity for those who require transcript the same benefit.
Don’t force them to submit email address and to get a PDF copy. No, it should be on the page. It should be there ready for them.
It’s only fair that they get equal service like everyone else, and that includes people like me. I deserve the same access like everyone. We are not there to grow your email list. Do that in another way.
And also, if you are going to hide it, you’re not going to get those benefit ‘ve mentioned in terms of the engagement and the SEO benefit because they are hidden.
You can’t see them, whether it’s Google or the users, it’s not there. So you’re going to miss out anyway if you are hiding behind something.
And then finally, just check it again one last time and then press te publish. Of course, you can edit it afterwards, but just check it again for good measure, scan over it, look at it, make sure that it’s just a really good quality page that adds a lot to your audience.
Whether they even want to listen to the podcast or videos or not, just provide that awesome, awesome experience and that’s it.
Like I said, if you want to download the checklist, you can do that. You just follow the link in the description. And also, I would really recommend that you follow the link on what are the benefit of transcripts (as well as captions and everything else), just so that you can understand what you get out of it, what the users get out of it, and why it’s a win-win for everyone if you do it.
So hopefully this was useful. If you follow these steps, you will get a lot more out of it. You can check out the way I do transcripts. I do it in different ways.
I’m still experimenting, I’m still learning and I’m still trying different things, but that’s the whole point. It just about making it a really good experience for everyone when they access my content.
So check out the podcast section or the video section of my website. You will see examples there, but I would love to see some more examples out there.
So if you’ve seen really good quality transcripts, then I would like to see them. Let me know in the comments as well, what you think about this post. If you if you have any more questions, let me know.
Thank you for your interest in understanding what makes a good transcript. Make sure you hit that subscribe button, whatever platform that you are on.
And in the meantime, I will speak to you again.
Take care!
- What is ‘audism’? Plus my personal experiences of facing audism - October 27, 2021
- ‘CODA’ movie review: my thoughts on the latest deaf movie to be released - October 13, 2021
- Deafness as a ‘hidden/invisible disability’ - October 6, 2021
Leave a Reply